This guide covers integrating Ultra Dynamic Sky (UDS) into AVE II for enhanced weather and time-of-day simulation. We will establish communication between the WBP_CompassClock_01 widget and UDS using a custom controller.
💡Note: For advanced configurations outside this basic setup, refer to the Ultra Dynamic Sky Documentation.
1. Import the Custom Controller
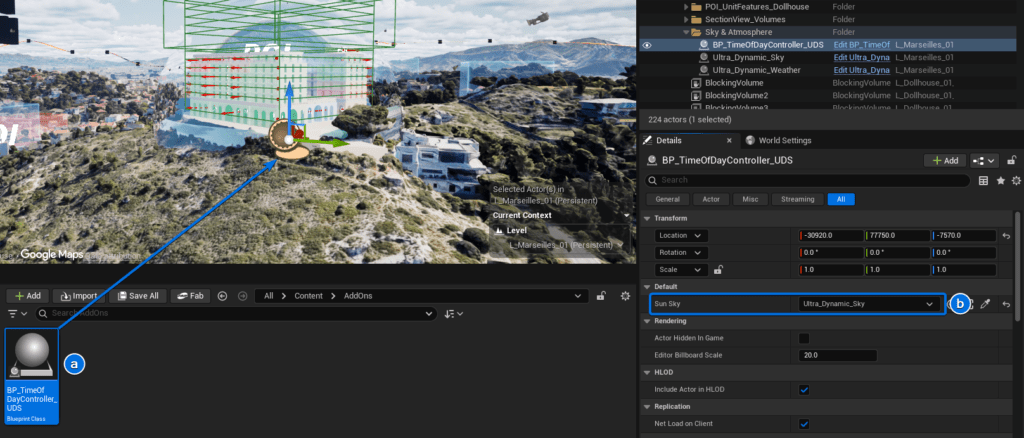
Download and import the BP_TimeOfDayController_UDS into your project. This blueprint acts as the communication bridge between your compass clock widget and the UDS system.
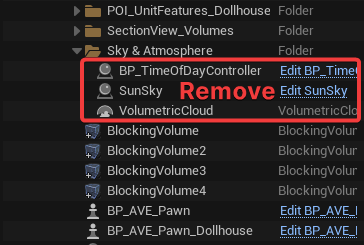
2. Clean Up Existing Sky Actors
Navigate to the Outliner and expand the Sky & Atmosphere folder. Delete the existing SunSky, VolumetricCloud, and BP_TimeOfDayController Actors from your level.
⚠️Warning: Removing these default sky actors may temporarily darken your viewport. This is normal and will be resolved in the next step.
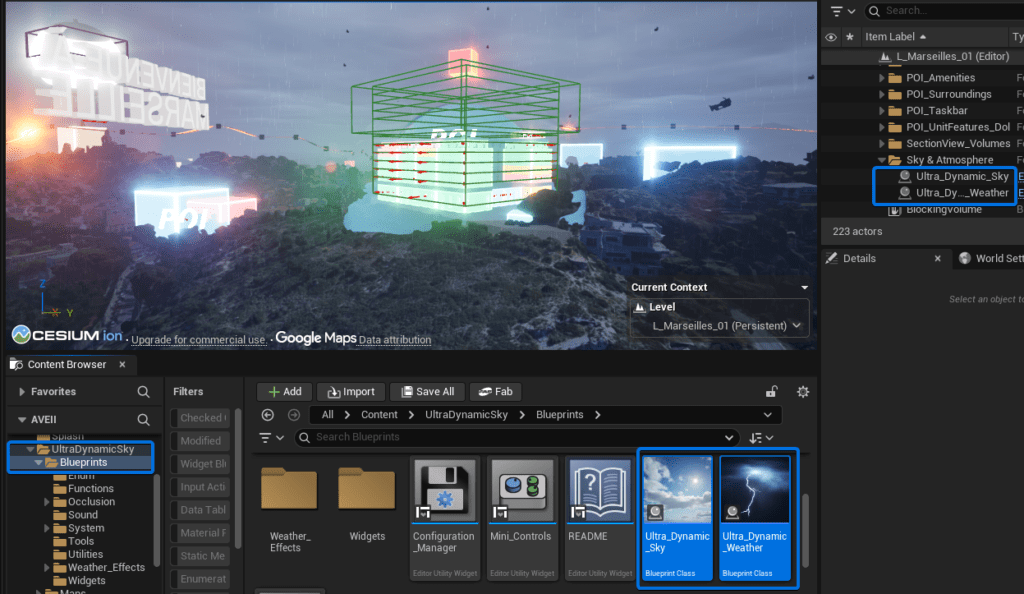
3. Add Ultra Dynamic Sky to the Level
Open the Content Browser and navigate to UltraDynamicSky > Blueprints. Drag and drop both the Ultra_Dynamic_Sky and Ultra_Dynamic_Weather Blueprints directly into your level.
4. Adjust Sun Light Intensity
After adding UDS, Points of Interest (POIs) may glow excessively due to lower default lighting. Select Ultra_Dynamic_Sky in the Outliner. In the Details panel, navigate to E1 Sun > Sun Light Intensity and set the value to 7500 lux.
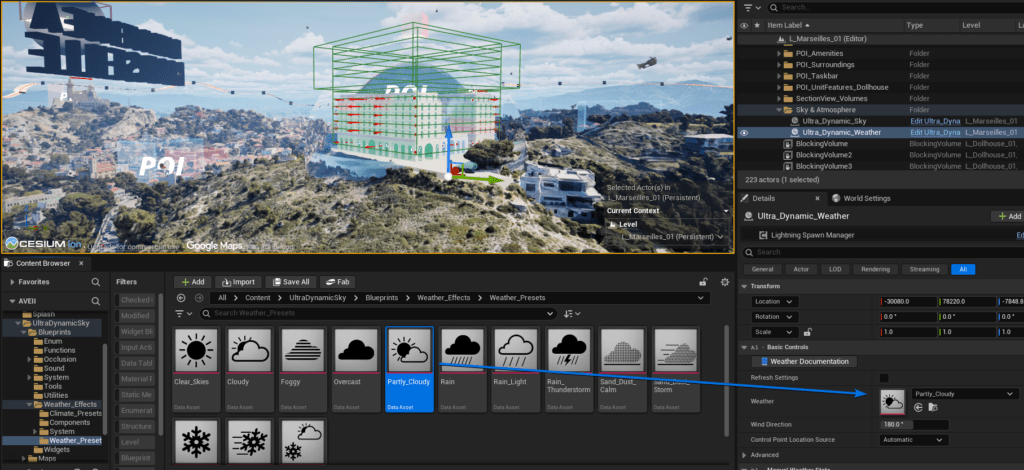
5. Configure Weather Settings
Select the Ultra_Dynamic_Weather actor in your Outliner. In the Details panel, locate the A1 Basic Controls section and assign your preferred weather state from the dropdown menu.
💡Tip: For optimal scene visibility, we recommend lowering the Base Fog Density. You can find this setting by selecting the
Ultra_Dynamic_Skyactor and navigating to the F2 Fog Density category.
6. Place and Link the UDS Controller Drag your newly imported BP_TimeOfDayController_UDS into the level. With the controller selected, go to the Details panel and assign your Ultra_Dynamic_Sky actor to the Sun Sky property.
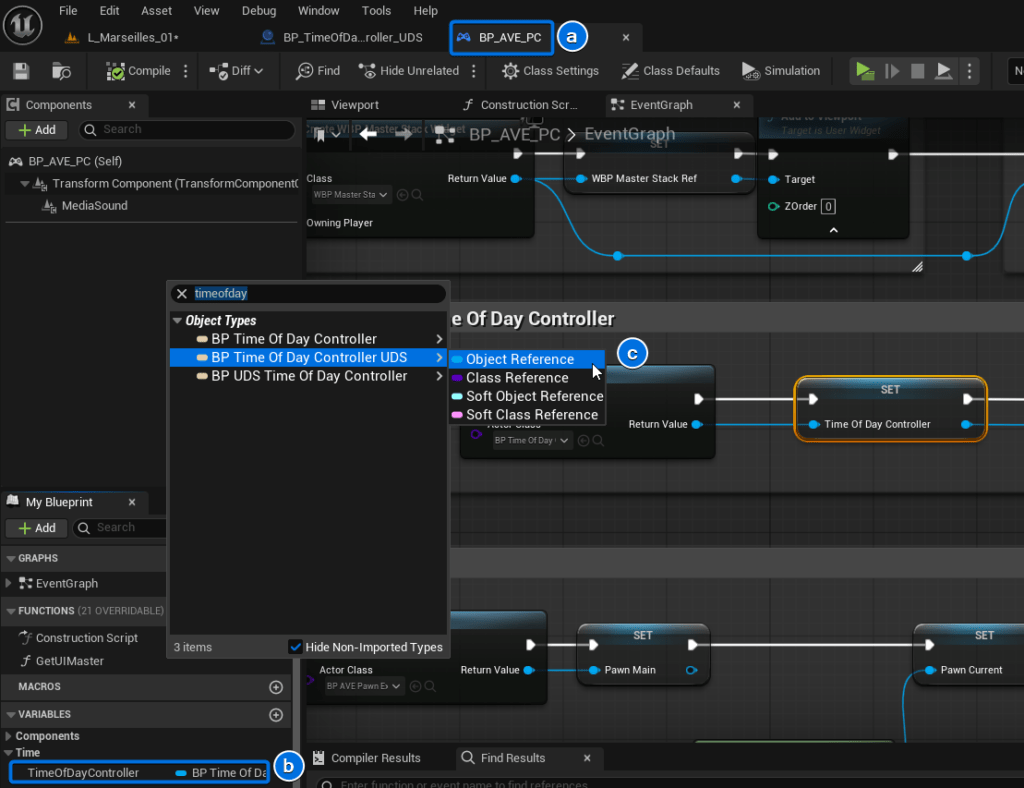
7. Update the Player Controller Open the BP_AVE_PC Player Controller blueprint. Locate the existing TimeOfDayController variable and change its Variable Type to reference BP_TimeOfDayController_UDS. Compile and save the blueprint.
8. Update BP_AVE_PC References
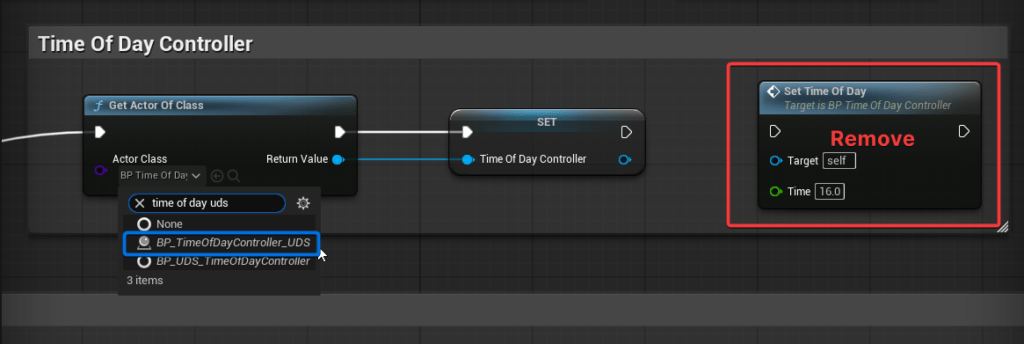
Inside BP_AVE_PC, change the Variable Type of the TimeOfDayController variable to BP_TimeOfDayController_UDS. Next, update the Get Actor Of Class node to match this new class. Finally, disconnect the link to the Set Time Of Day node. This establishes the connection with the WBP_CompassClock_01 widget.
9. Set the Initial Time of Day To define the starting time for your application, select the Ultra_Dynamic_Sky actor in your level. Navigate to the Details panel and adjust the Time of Day value to your desired start time.
💡Note: You may need to open and compile
BP_TimeOfDayController_UDSafter making these changes to clear any lingering blueprint errors.