The Taskbar in AVE II facilitates switching between game modes. This guide explains how to implement mode requests via BPI_CoreAPI, assign Points of Interest (POIs) to specific taskbar buttons, and handle the resulting logic within the Game Instance.
📂 Location: AVEII > UI > Panels
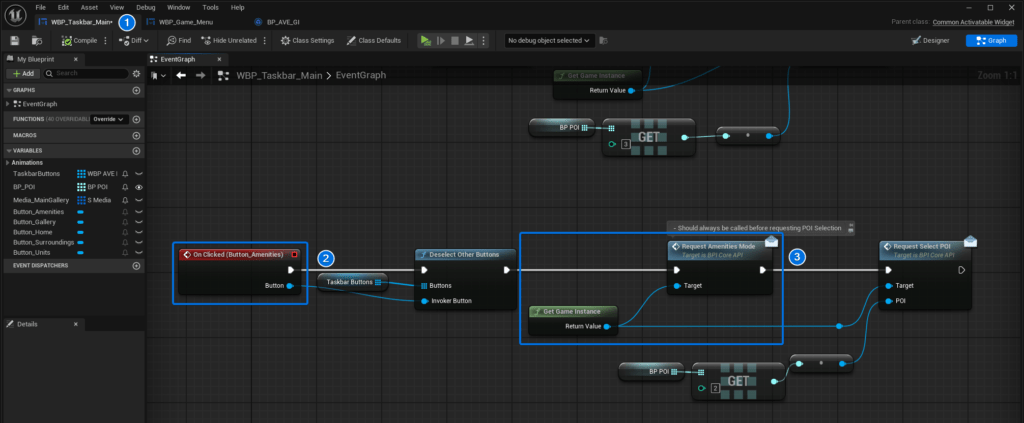
Sending Mode Requests
To initiate a mode switch, the Taskbar widget must send a request to the Game Instance (BP_AVE_GI) via the Blueprint Interface BPI_CoreAPI when a button is clicked.
- Open WBP_Taskbar_Main.
- In the Event Graph, find the OnClicked event for the desired mode button.
- Call the relevant Blueprint Interface function from BPI_CoreAPI (e.g.,
RequestAmenitiesMode).
Optional: CallRequestSelectPOI(viaBPI_CoreAPI) to define the pawn/camera transform and constraints for the target mode.
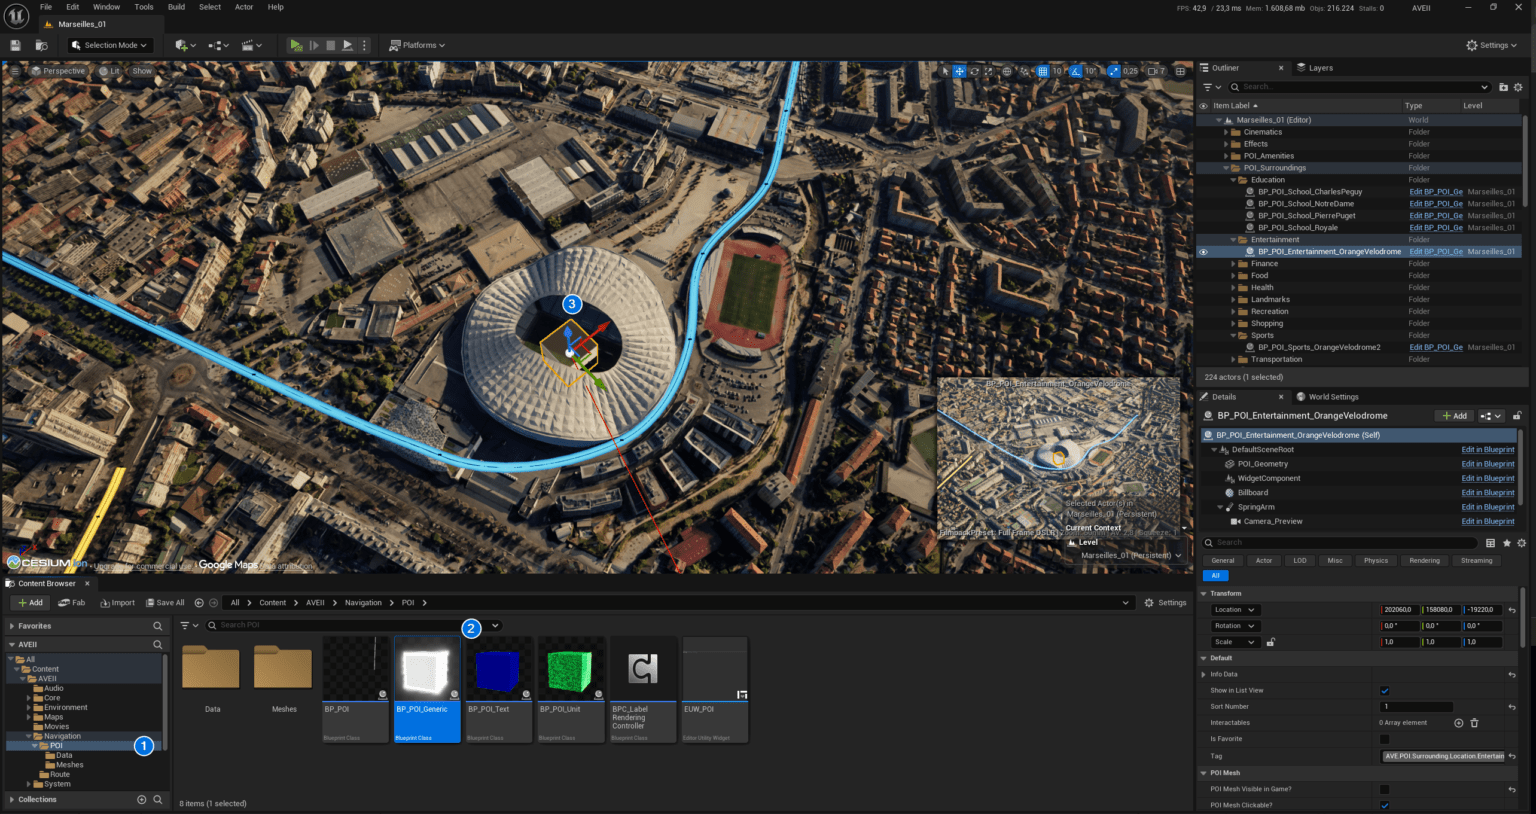
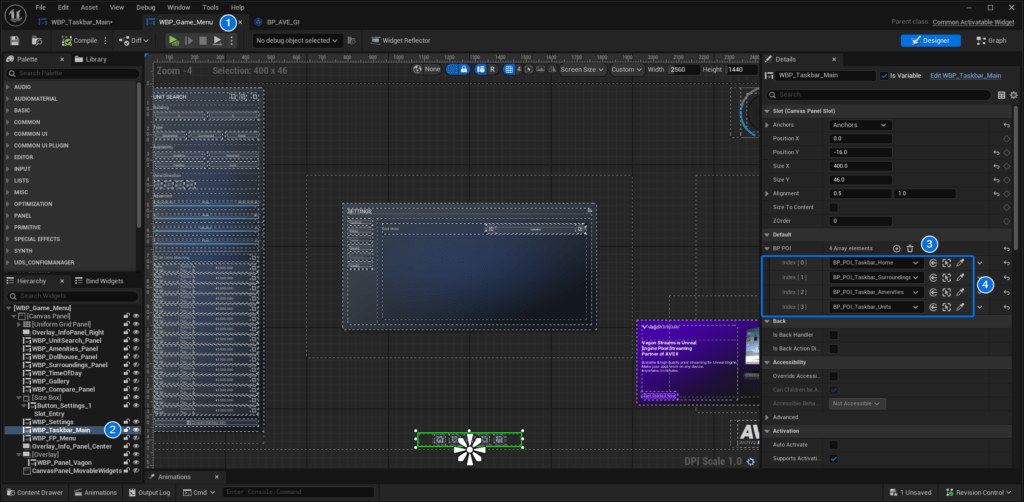
Assigning POIs to Taskbar Buttons
Although the buttons exist within the Taskbar widget, the actual assignment of POIs happens inside the parent WBP_Game_Menu.
- Open WBP_Game_Menu.
- Select the WBP_Taskbar_Main widget reference in the hierarchy.
- Locate the BP_POI array in the Details panel.
- Assign the relevant POI Soft Object Reference from the level to the array index that corresponds to the specific taskbar button.
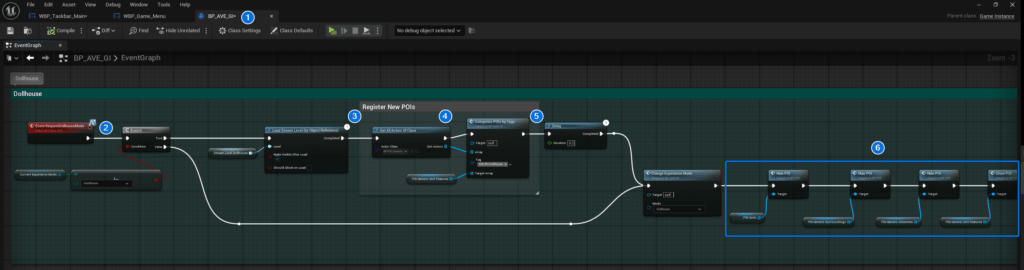
Handling Requests in Game Instance
Once a request is sent, BP_AVE_GI (Game Instance) handles tasks such as toggling POIs and loading streaming levels.
Example: Dollhouse Mode Implementation
The following workflow demonstrates handling a request to switch to Dollhouse mode, which requires loading a specific streaming level and registering its POIs.
💡 Note: Check Game Instance Implementation Examples for the capabilities of
BP_AVE_GI.
- Open BP_AVE_GI.
- Implement the Event RequestDollhouseMode.
- Load the required Stream Level.
- After the level loads, use GetAllActorsOfClass to retrieve
BP_POI_Genericactors. - Pass these actors to the CategorizePOIsbyTags function to register them with the Game Instance.
- Toggle POI visibility based on their type.
POI_Generic_Unit_Features array.