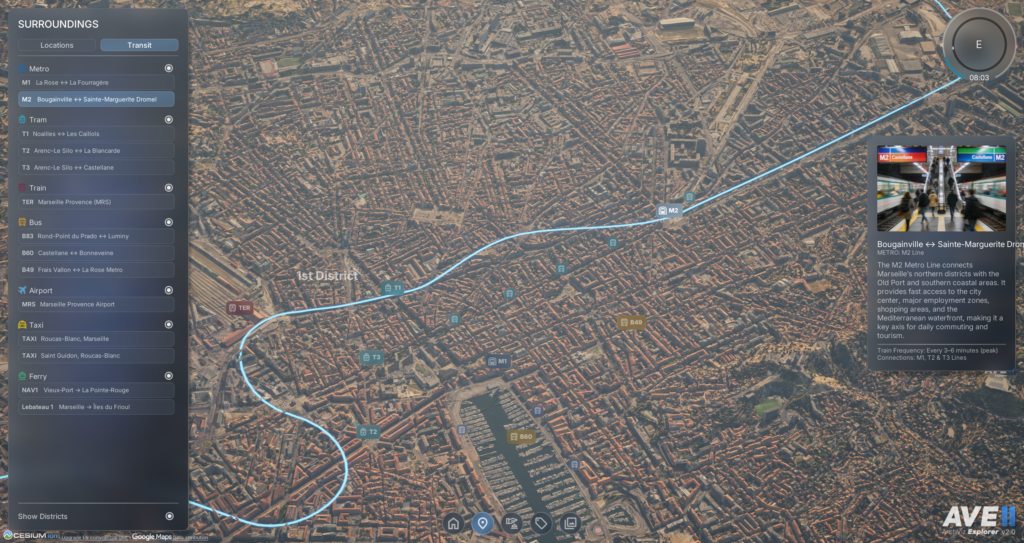
In this step-by-step guide, we will create the Metro Line M2 (Marseilles). This basic, easy-to-follow example will show you how to build a fully interactive map layer that users can toggle via the Surroundings panel to see the city’s connectivity. Routes are the best way to draw informative overlays directly into your world. By utilizing the BP_AVE_Routes spline actor, you can visualize public transit networks, subway lines, tramways, boundaries and pedestrian paths.
Placing the Route Actor
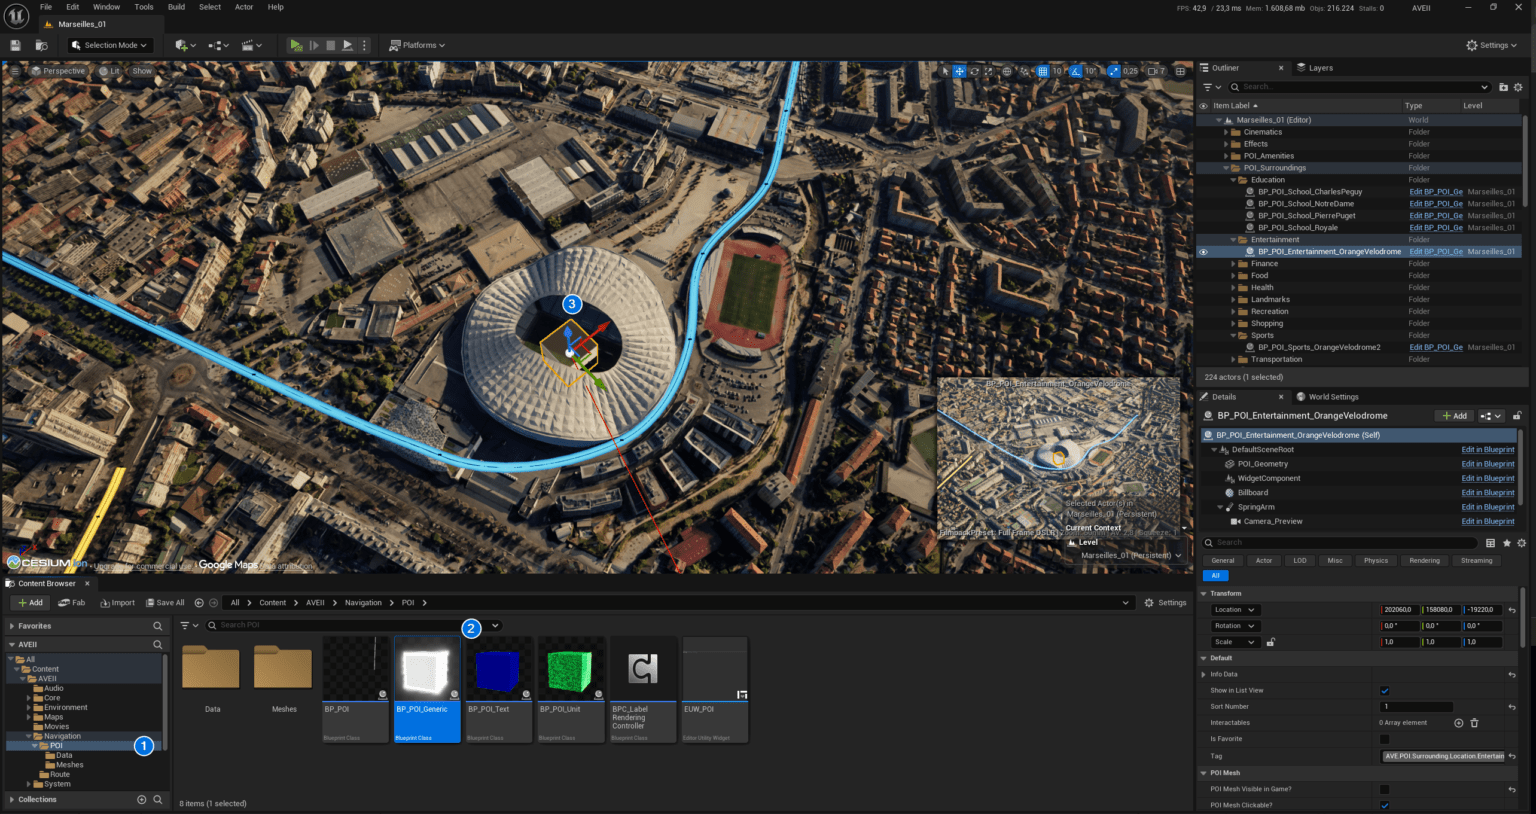
To begin, locate the BP_AVE_Routes Blueprint in your content browser. Drag and drop the actor into your level to serve as the starting point for your new line.

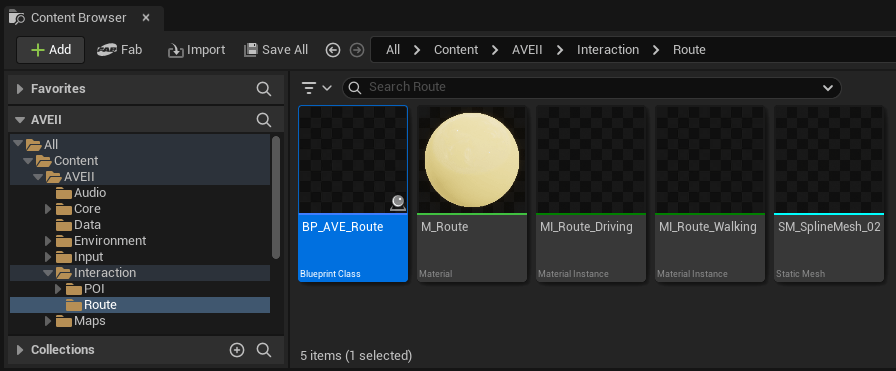
📂 Location: Content > AVEII > Interaction > Route
For the best editing experience, switch your viewport to Top View (shortcut: Alt + J). We recommend positioning the actor high above the terrain initially; this ensures the line remains visible while you map out the path and prevents it from getting lost under geometry.
Defining the Path with Splines
With the actor selected, click on the spline point visible in the viewport. You can now extend the route to match your real-world data:
- Hold the Alt key and drag the spline point to create a new segment.
- Continue tracing the path of the M2 Metro Line across your map.
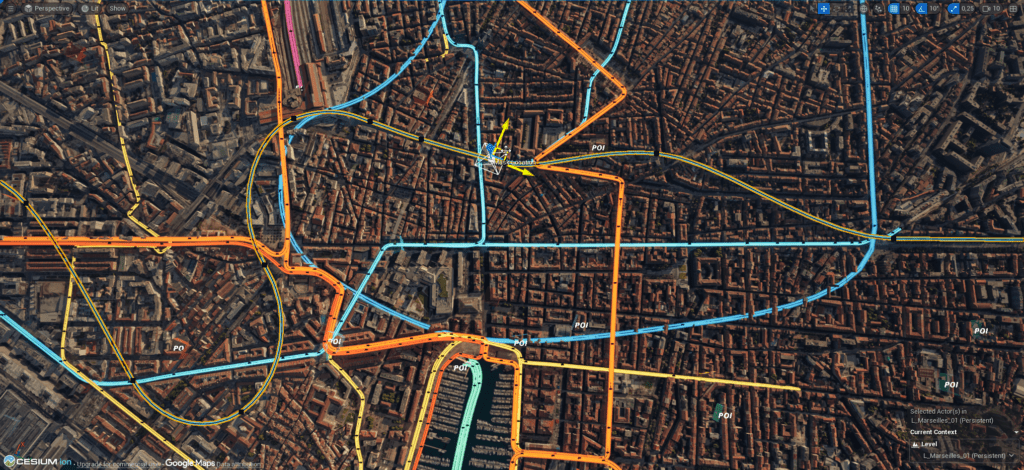
Tip: When starting out, try to move and rotate the spline points along a single axis. This helps keep the line clean and prevents the spline from twisting or banking unexpectedly, which can be difficult to fix later.
Aligning to the Terrain
Once you have traced the full length of the route, you need to conform it to your landscape. Instead of manually adjusting the height of every point, use this quick workflow shortcut:
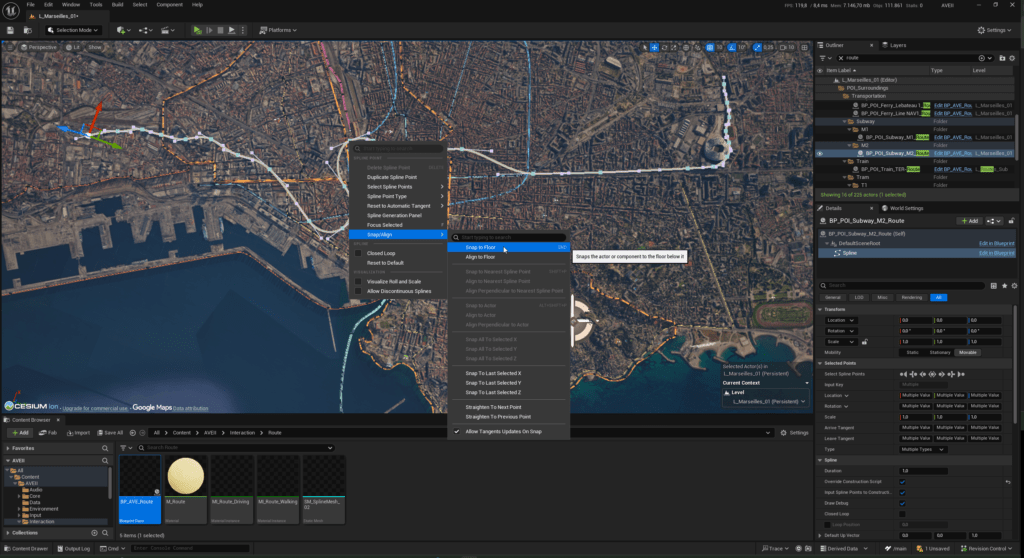
- Select all individual spline points in the chain.
- Press the End key on your keyboard. This automatically snaps every point down to the underlying ground or terrain.
- Finally, manually move the entire selection slightly up on the Z-axis. This ensures the route renders cleanly on top of the ground without any “Z-fighting” or clipping issues.
Configuring the Visibility Mask
The BP_AVE_Routes actor includes a masking system that creates a smooth “reveal” animation when the route is activated.
- In the Details panel, find the Mask category.
- Position the Mask Location near the middle or end of your spline path.
- Set the Mask Radius to a high value to start.
- Note: This radius defines the visible area of the route. Segments of the spline outside this radius will be hidden.
- Fine-tune the radius value until the transition effect feels smooth and encompasses the entire route when active.
Customizing the Look and Feel
Now that the logic is in place, you can style the route to match the identity of the transit line.
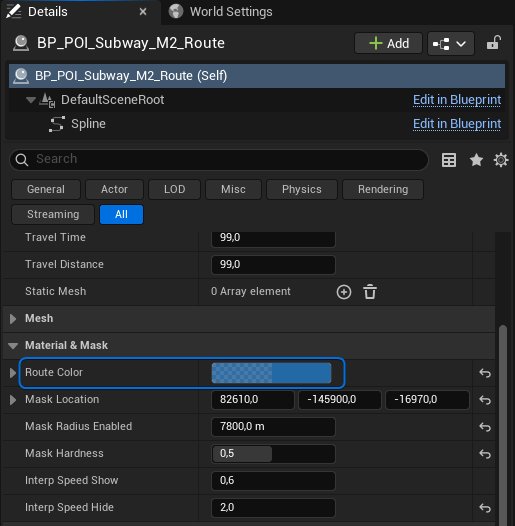
- In the Details panel, change the Route Color. Select a representative color (e.g., Red or Orange).
- It is good practice to rename your actor in the World Outliner.
Linking the Route to a POI
For the route to appear in the user interface, it must be driven by a Point of Interest (POI) actor. The POI acts as the “controller” that holds the data and tells the route when to turn on.
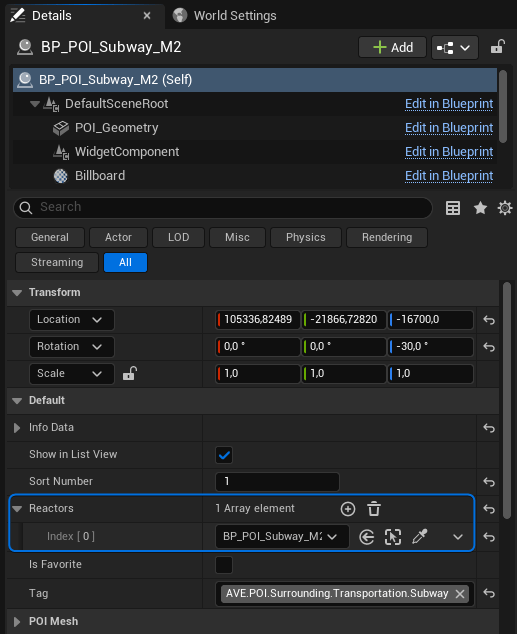
- Place a new POI actor in your level (or select an existing one).
- Fill in the visible UI data, such as the Name (“Metro Line M2”) and Description.
- Scroll down to Details > Default > Reactors.
- Click the + sign to add a new reactor slot, then select your
BP_POI_Subway_M2_Route actor from the list.
Assigning the Category Tag
The final step is to ensure the button appears in the correct menu within the Surroundings panel. We use Gameplay Tags to sort content automatically.
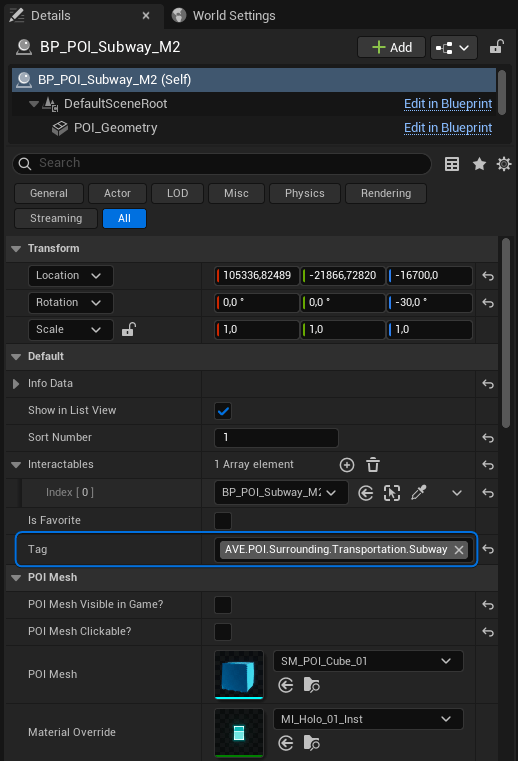
Assign the tag AVE.POI.Surrounding.Transportation.Subway to your POI actor.