Welcome to AVE II, a real‑estate visualization experience built in Unreal Engine 5. This guide helps you quickly understand the core systems, navigation, and workflow so you can begin integrating AVE II into your project or exploring its features.
Overview
AVE II provides an intuitive, high‑quality exploration system designed for property showcases, interactive tours, and architectural presentations. It includes:
- Multiple Player Pawns for different viewing modes
- Touch and mouse input support via Enhanced Input
- Focusable actors and Points of Interest
- Built‑in filtering and categorization
- Data‑driven UI using structs and data tables
Prerequisites
Before beginning your setup with AVE II, ensure your development environment meets the following requirements. These dependencies are essential for the core functionality of the aviation and UI systems.
- Unreal Engine 5.6+: Ensure you are using the latest stable build of the engine.
- Enhanced Input Plugin: Required for advanced control mapping and input handling.
- Cesium for Unreal Plugin: (Free on FAB) Necessary for global-scale terrain and geospatial data.
- Common UI Plugin: (Engine Default) Provides the framework for cross-platform, focusable UI elements.
- Sun Position Calculator Plugin: (Engine Default) Required for accurate geographical sun positioning and time-of-day calculations.
- Text 3D Plugin: (Engine Default) Utilised for high-fidelity 3D text rendering within the world.
- Blueprint & UMG Proficiency: You should be comfortable with standard Unreal Engine visual scripting and User Widget workflows.
💡 Tip: While not strictly required, having the Cesium for Unreal plugin (free) enabled is highly recommended for projects using real-world coordinates alongside Cesium.
Creating and Launching a New AVE II Project
Once you have purchased AVE II from the FAB Marketplace, follow these steps to initialize a new project file.
- Open the Epic Games Launcher and log in with the account used to purchase the asset.
- Navigate to the Library tab and locate the Fab Library section.
- Find AVE II in your list and click the Create Project button.
- In the popup window, configure your project:
- Name: Enter a custom name for your project.
- Folder: Select the installation directory.
- Engine Version: Choose your preferred Unreal Engine version.
- Click Create and wait for the download and setup process to complete.
- Once finished, the project will appear in the My Projects section of your Library.
- Double-click the project thumbnail to launch your new AVE II project.
⚠️ Important: Before opening your new project, you must ensure the Cesium for Unreal plugin is installed for your specific engine version. Opening the project without this plugin may cause errors or missing assets.
Project Settings
Configuring Game Instance
To ensure AVE II functions correctly, you must verify specific project settings. These configurations establish the communication backbone between the UI and your Blueprint logic.
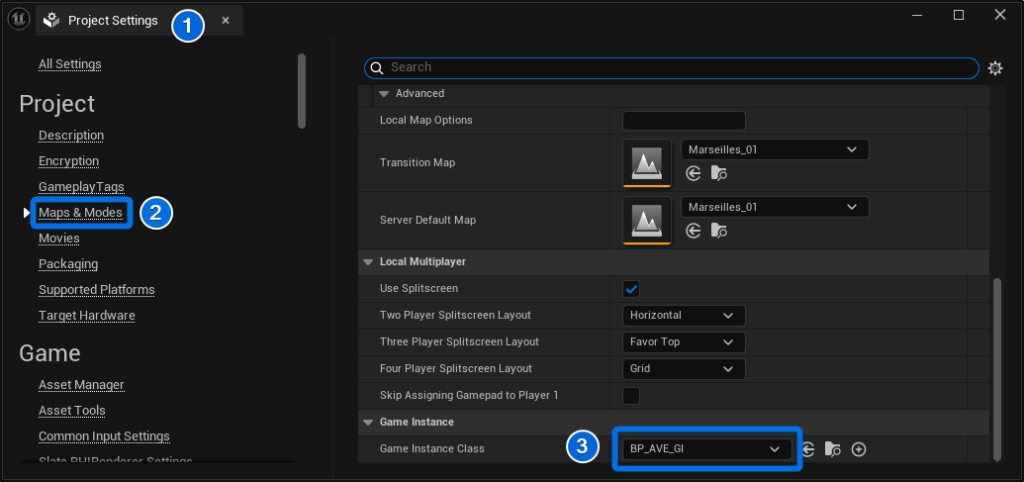
- Open the Project Settings window by navigating to Edit > Project Settings.
- In the left-hand sidebar, select the Maps & Modes category.
- Locate the Game Instance section at the bottom of the panel.
- Set the Game Instance Class to BP_AVE_GI.
💡 Note: The
BP_AVE_GIclass is essential for handling global communication and persistent data between the UI and gameplay elements.
Configuring Enhanced Player Input Class
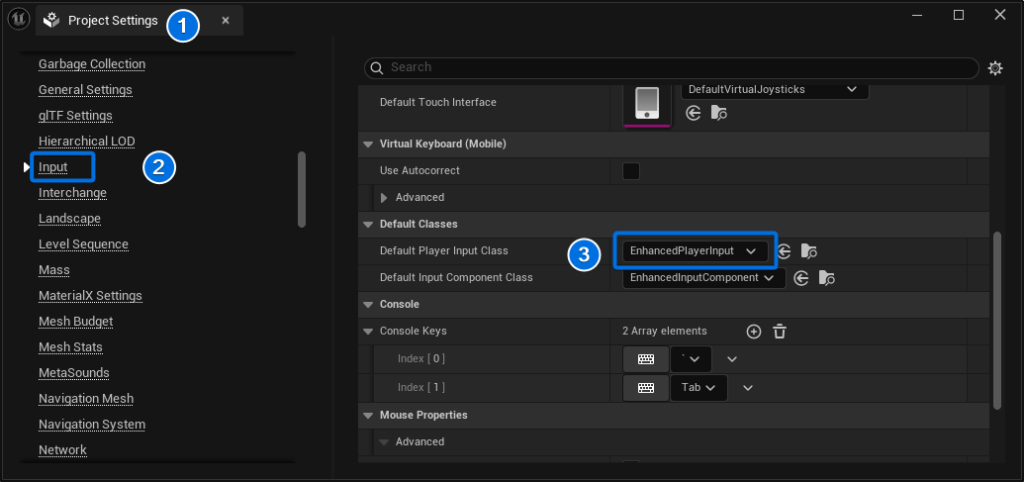
To support advanced input handling in AVE II, you must configure the default input class in your project settings.
- In the Project Settings window, navigate to Engine > Input.
- Scroll down to the Default Classes section.
- Set the Default Player Input Class dropdown to EnhancedPlayerInput.
💡 Note: This ensures the project utilizes the Enhanced Input system, which is required for AVE II’s control schemes.
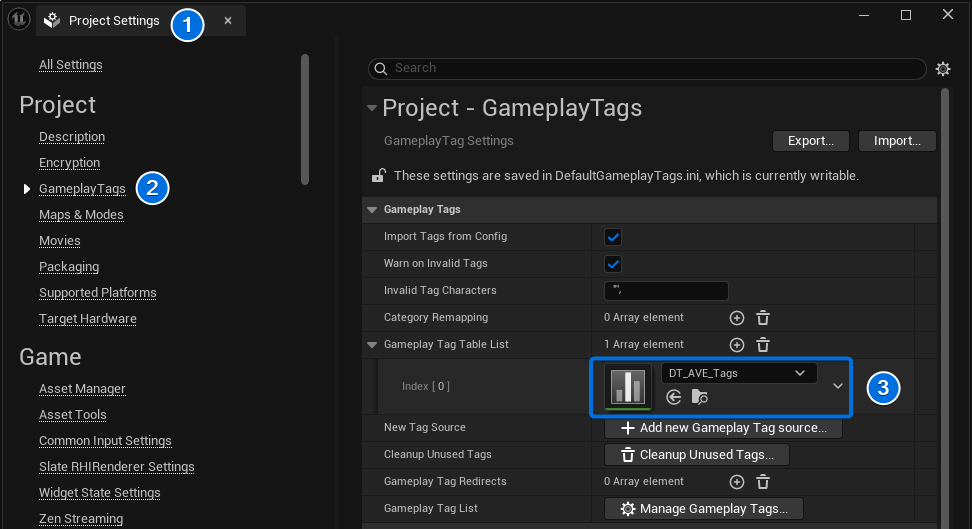
Configuring Gameplay Tags
If missing, you must manually assign the Gameplay Tag Table to prevent errors during packaging and runtime interaction.
- In Project Settings, navigate to Project > GameplayTags.
- Locate the Gameplay Tag Table List array.
- Add a new entry and select DT_AVE_Tags from the dropdown menu.
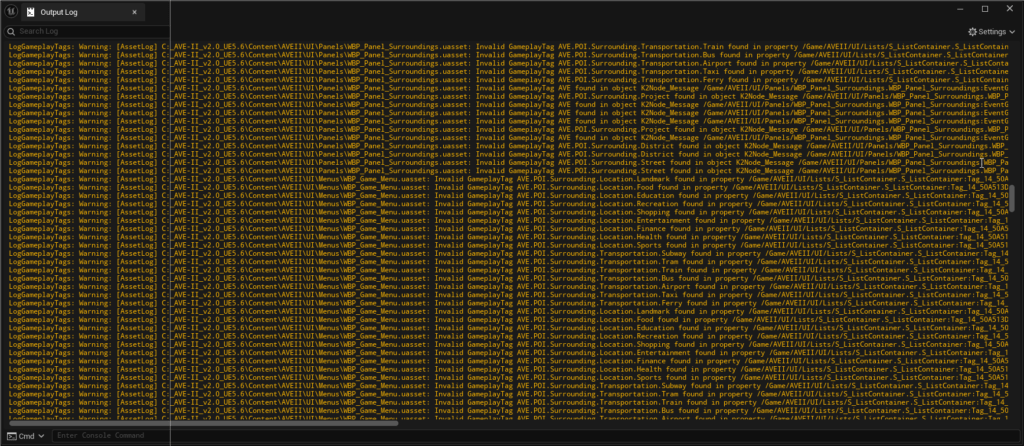
⚠️ Warning: Failure to assign
DT_AVE_Tagswill result in warnings in the Output Log during packaging. Additionally, you will be unable to modify Tags for Point of Interest (POI) actors in the scene.
💡 Note:
DT_AVE_Tagscontains all active tags used in the project. You may extend this Data Table with new tags as required.
Cesium Authentication
To enable geospatial streaming in your project, you must authenticate the Cesium for Unreal plugin. This process links the Editor to your Cesium ion account and assigns a project-specific access token.
Prerequisites
- The Cesium for Unreal plugin must be installed and enabled.
- The map
L_Marseilles_01should be open.
Steps
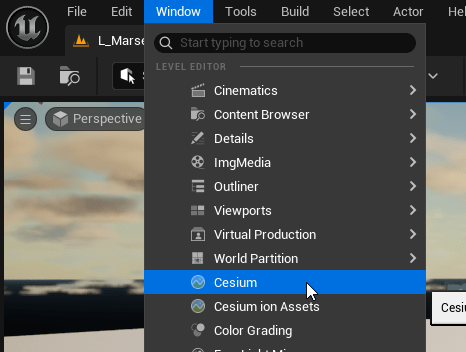
1. Open the Cesium panel by selecting Window > Cesium from the main menu.
2. Click Connect to Cesium ion. This will launch a login page in your default web browser.
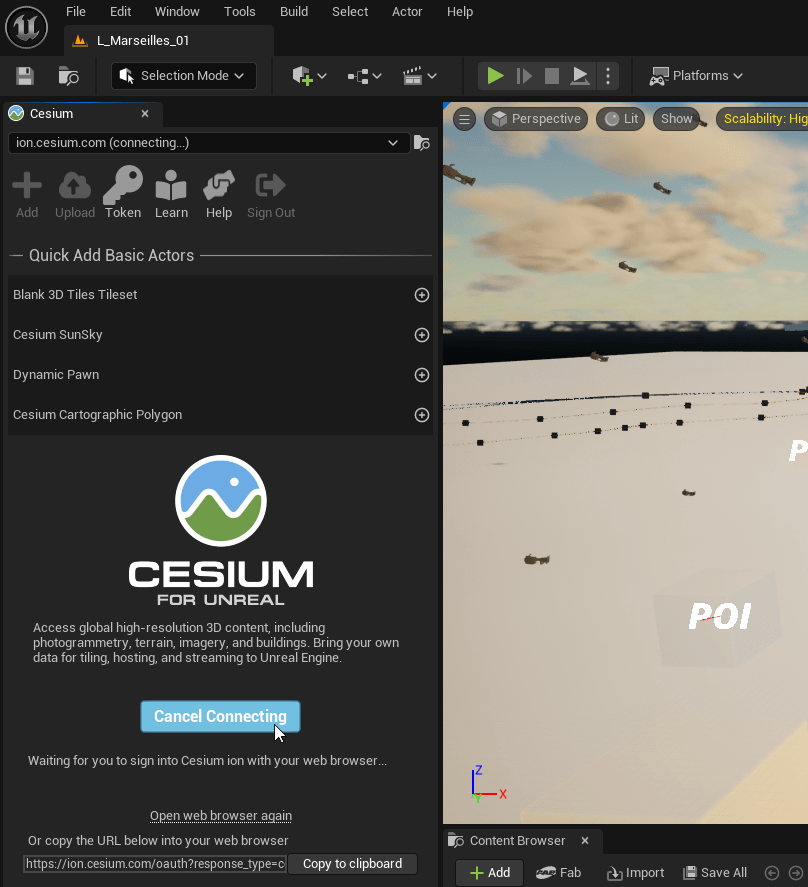
3. Sign in to your Cesium ion account and click Allow to grant Unreal Engine permissions.
4. Return to the Unreal Editor. In the Cesium panel, click the Token button.
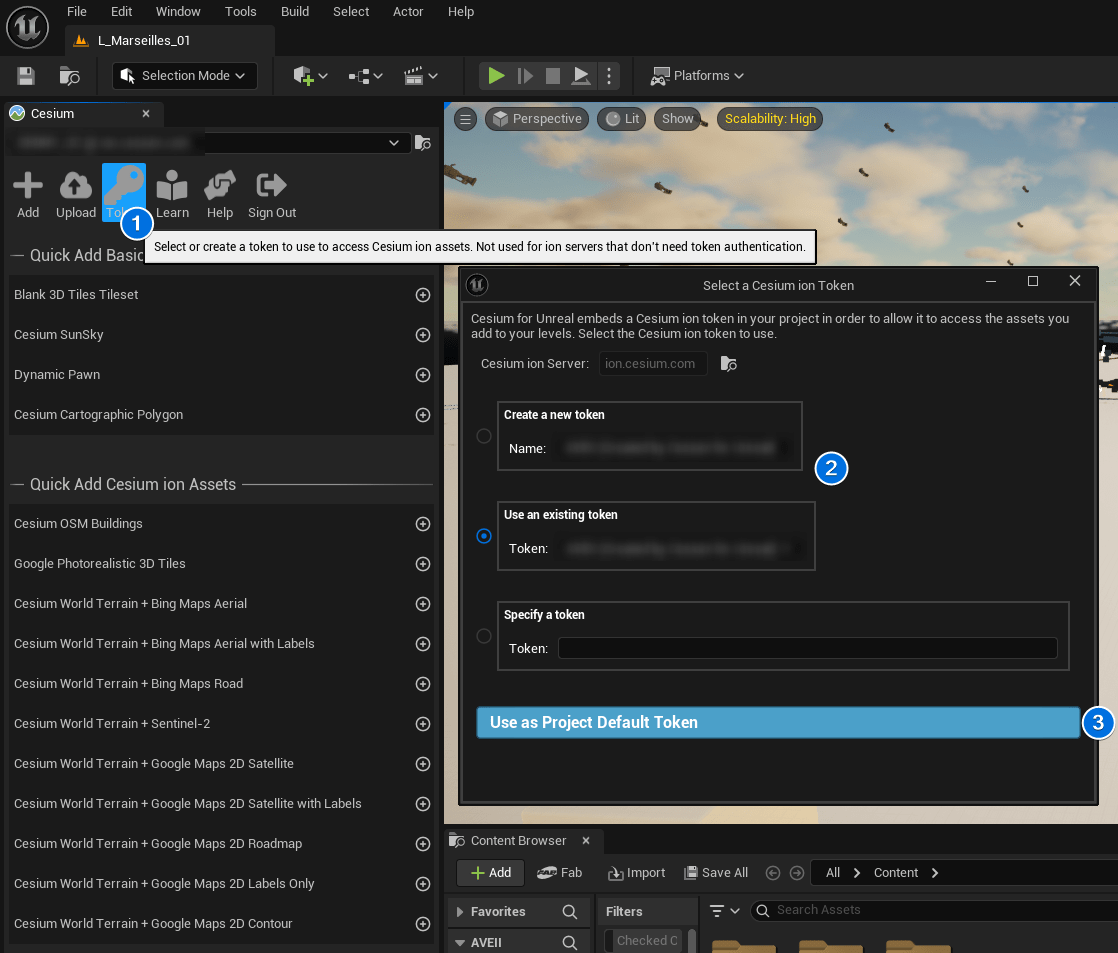
5. Select Create a new token and click Create New Project Default Token. This action generates the necessary credentials to stream the existing 3D tiles in your level.
6. Verify that the tileset loads in the Viewport.
Troubleshooting
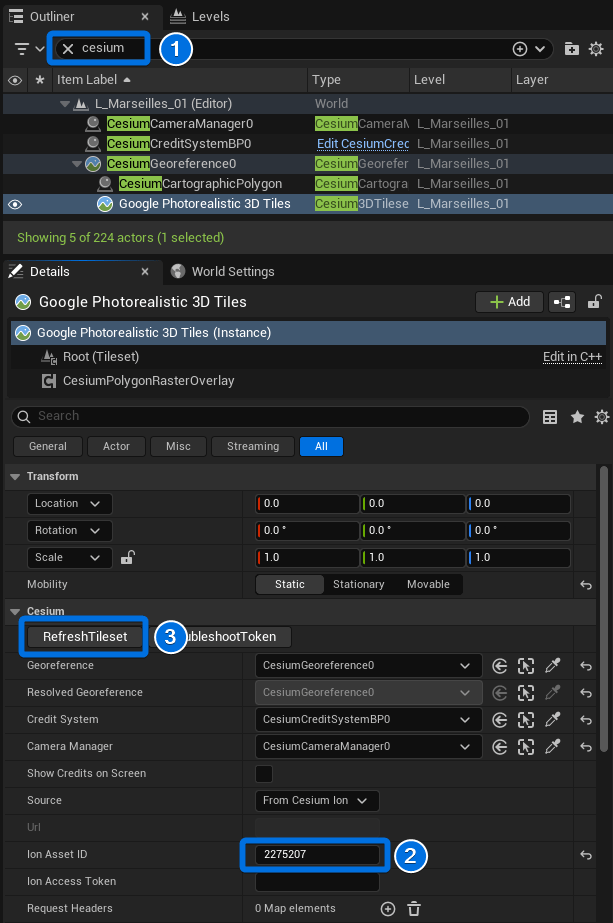
If the tileset does not appear after authentication:
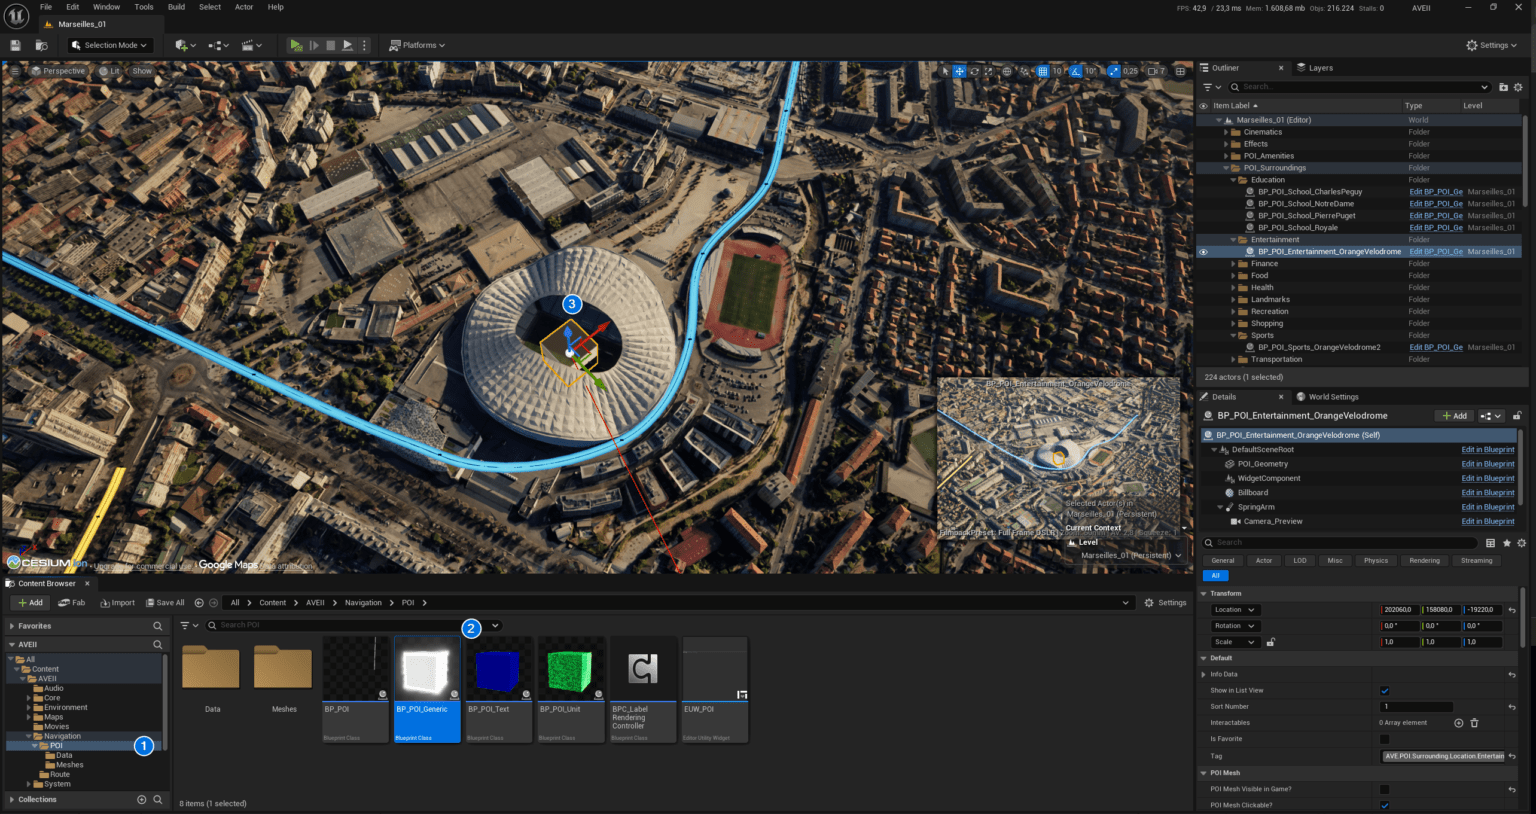
- Select the CesiumGeoreference actor in the Outliner.
- Select the Google Photorealistic 3D Tiles component attached to the actor.
- In the Details panel, click the RefreshTileset button.
- If the tiles still fail to load, click TroubleshootToken to verify your access credentials.
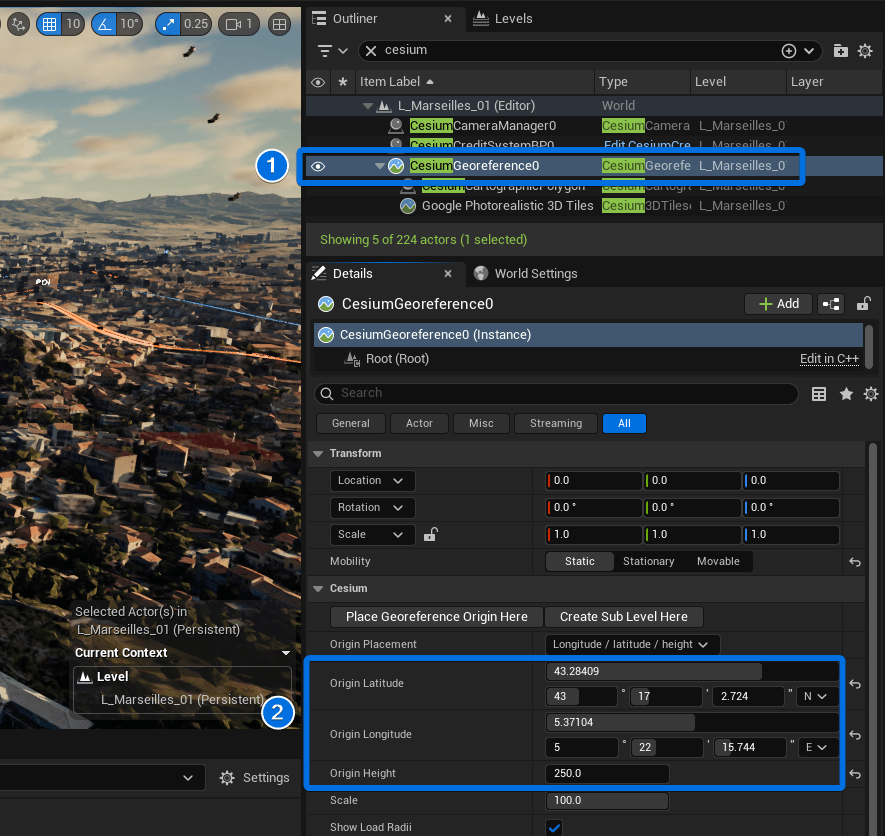
Restoring Default Georeference Coordinates
If the CesiumGeoreference actor is accidentally moved or modified, the 3D tileset alignment may be disrupted. Use the following default coordinates for the L_Marseilles_01 map to restore the correct geospatial position.
- Select the CesiumGeoreference actor in the Outliner.
- In the Details panel, locate the Cesium category.
- Manually input the following values to reset the origin:
- Origin Latitude:
43.28409 - Origin Longitude:
5.37104 - Origin Height:
250.0
- Origin Latitude:
💡 Note: Ensure the Origin Placement mode is set to Longitude / Latitude / Height before entering these values.